Cutting kitchen worktops to size and connecting them

Description
To create a clean, precise corner solution, as shown, you need a special worktop template, a cutter and a particularly powerful router to connect the kitchen worktops.
It is not worth purchasing this expensive special tool if you only need to connect worktops occasionally. In this case, it is better to mitre-cut the worktops and connect them to one another. This process enables you to cut a kitchen worktop at almost any angle. This is particularly advantageous if you need to create 135 degree worktop corners as well as 90 degree ones.
The grain of solid wood or decorative wood worktops, such as those on picture frames, converge precisely at the mitre. In contrast, the grain on the solution shown here runs bluntly up to the transverse panel at 90 degrees. If you are using an abstract decor or a stone decor as a worktop surface, then this type of 90 degree butt joint is not so obvious. But even so, it is still much less conspicuous if the worktops are connected by a mitre joint at the corner than with a 90 degree butt joint.
The only disadvantage of mitre joints: If you have a worktop with a depth of 60 cm, you need a worktop that is 60 cm longer.
The following material is required:
- Silicone, transparent or in a colour that matches the worktop
- Worktop connector

Tools/accessories


Alternative tools


Preparation/set-up
-
Make the following preparations on the work surface and tools:
First, clamp the worktop on wooden supports or the MFT/3 with support battens for sawing. The sawn-off piece must not be left hanging, it must be fully supported.
Use a pencil to mark the mitre-cutting line on the top of the worktop. To do so, use a mitre angle or a large setting angle/bevel.
If necessary, change the saw blade on your circular saw for a Z 48 trapezoidal flat teeth laminate/mineral saw blade (Festool colour code red).
If the splinter guard for your guide rail does not yet match the cutting line of the circular saw, then first cut the splinter guard with a cutting depth of approx. 6 mm and speed level 2 along the entire length of the rail. Before you do so, please observe the backlash-free movement of the plunge-cut saw on the guide rail.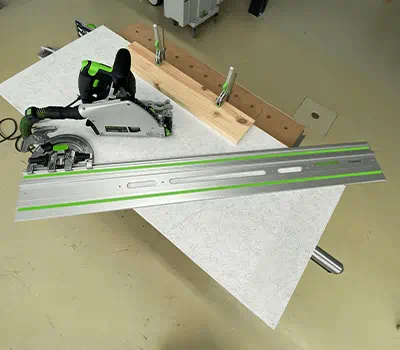
-
Set the tool and accessories as follows before cutting to size:
Align the guide rail splinter guard precisely with your marking and secure the rail to the worktop with appropriate fastening clamps.
When cutting a 38 mm thick worktop to size, set the depth of the circular saw to 48 mm (i.e. approx. 10 mm deeper than the thickness of the wood worktop).
To saw the worktop, set the portable circular saw to the highest speed – level 6.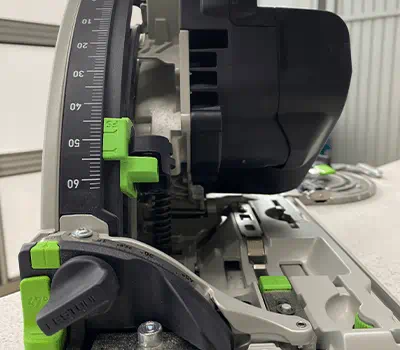


Procedure
-
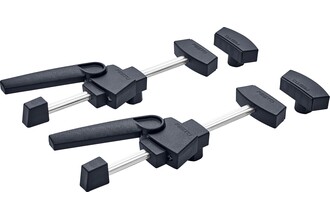
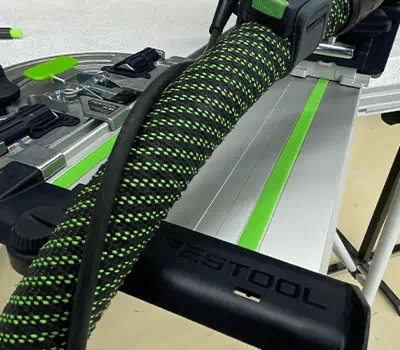
To precisely mitre-cut a 60 cm deep worktop, you need a Festool plunge-cut saw with a guide rail of length 1400 mm. A deflector for the stop rail is a recommended and useful accessory when cutting to size. It prevents the suction hose and the cable getting caught on the end of the rail. To achieve a clean, low-splinter cut, it is essential to use the right saw blade. For solid and veneered worktops, you need a cross-cut, fine tooth saw blade with 48 teeth. For laminated worktops, it is advisable to use the triple chip grind saw blade, also with 48 teeth.
-
In addition to the using the right saw blade, a splinter guard is essential for ensuring a low-splinter cut. During the first sawing operation, it is cut exactly to the cutting line of the circular saw and the stop rail. This ensures exact positioning of the rail and a low-splinter cut. If the splinter guard is damaged, it must be replaced with a new one. Before you cut a kitchen worktop to size, you should place the worktop on several wooden beams and secure it against slipping with clamps on the workbench.
Now you can carry out the required mitre cuts. Where possible, the cutting line should be selected so that the worktop cannot break on the front edge.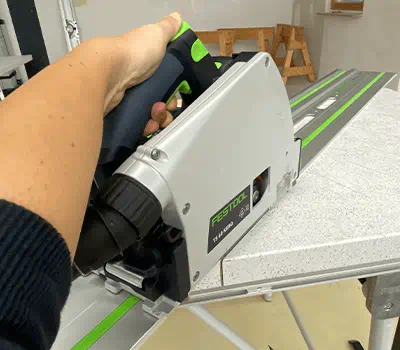
-
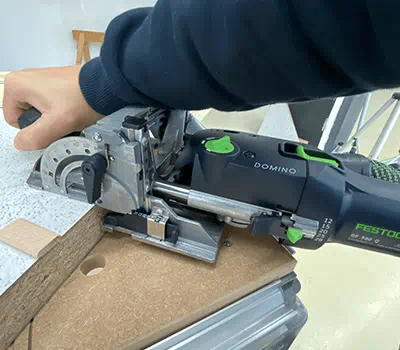
In the cutting edges, now use the DOMINO jointer DF 500 to rout four elongated holes from below and four from the top of the worktop. If the worktops are not identical in terms of wood thickness, you should only make slots from the top, i.e. from the laminate with 6x40 DOMINO. This ensures there is no transition between the two worktops on the top. The bottom normally faces the cupboard elements, so any inaccuracies here are not conspicuous.
-
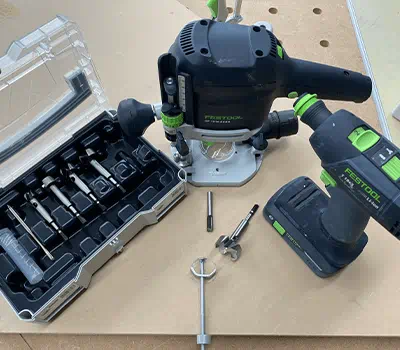
Worktop connectors are available on the market in a variety of lengths. In some situations, a longer connector can be advantageous for assembly. But the short connector is normally sufficient. To make recesses for the connectors, you will need a Forstner or cylinder drill bit with a 35 mm diameter, along with a router with a groove cutter of diameter 8–10 mm. If your worktop has a depth of 60 cm, you should allow for three connectors. One at 11 cm from each end of the edging and one exactly in the centre. Use a set square to mark the three connector positions.
-
Refer to the manufacturer's product information for the worktop connectors for the correct spacing of the holes to the worktop edge. For example, for a screw length of 65 mm, the spacing from the edge to the centre of the hole is 30–37 mm, for a screw length of 110 mm, it is approx. 53–60 mm. Once you have marked the centre of the hole according to your connector, use the Forstner or cylinder drill bit to drill deep enough that the metal tabs are fully countersunk in the holes. The connector must not protrude under any circumstances.
Tip:
Alternatively, you can use the Festool D14 flat connectors and the Domino XL router to make the connections.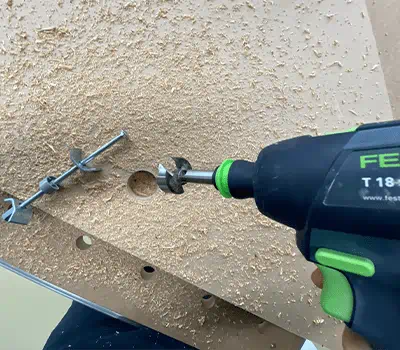
-
You can create the little connection groove for the screw most quickly with the router and a groove cutter with dia. 8–10 mm. To do so, mark the exact position and width of the groove on the worktop. Then rout a groove approx. 20 cm deep and max. 10 mm wide along the marking with the guide rail. In doing so, note that you can guide the tool freehand more easily if you carry out the routing in two steps, each approx. 10 mm deep. This will also protect your router.
You can now use wood glue (white glue) to glue the DOMINO 5x30 in the routed domino holes on one side. Position the two worktops opposite one another with a spacing of approx. 2 cm. Now use a cartridge gun to apply transparent silicone to the cutting edge of the worktop corner connection. (Only in the upper area so that moisture cannot penetrate). Push the two kitchen worktops together so that the silicone slightly protrudes at the butt joint. Then place the connectors into the cut-outs from below and tighten them with a spanner.
Tip:
Adjust the worktop on site before mitre-cutting.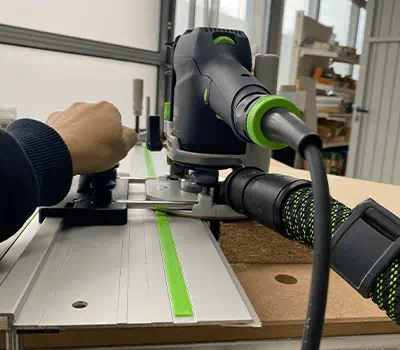


-
Our illustrated guides and work results are documented working steps that we have performed in practice. They are individual examples and do not guarantee or promise that users will obtain the same results. The results will depend on the user's experience and skill, as well as the material being used. Illustrated guides do not replace any Festool operating manuals and/or safety instructions. Liability for ensuring that the information, instructions and applications are free from content defects and defects of title, in particular with regard to the absence of defects, correctness, freedom from third party intellectual property rights and copyrights, completeness and fitness for purpose, is excluded. Claims for damages made by the user, regardless of their legal basis, are excluded. These liability exclusions are not applicable if the damage was intentional or caused by gross negligence, or in cases of statutory liability.
We cannot accept liability for damage resulting from defects.↑
