


Removing filler compound and adhesives from parquet flooring

Description
Tools/accessories


Alternative tools


Preparation/set-up
-
Attaching the DIA THERMO
The blue DIA THERMO has been specifically designed for such applications (thermoelastic adhesives). The assembly of this diamond disc and its correct use means that its service life is almost unlimited. Mount the diamond disc on the machine, as described in the operating manual. If there is no elastic adhesive on the levelling compound, we recommend using the DIA ABRASIVE disc (red). The DIA ABRASIVE disc (red) may only be used in this instance as any adhesive would clog this disc.

-
Adjusting the guide table
The supplied guide table controls the setting depth, ensuring that the wood flooring is not damaged and the process only removes what is absolutely necessary. The guide table is installed to the right and the left around the existing guide, set to the correct depth by rotating the guide table, and is fitted with the small rotary wheel. This may need to be readjusted.

-
Setting the AC to full power
Correctly adjust all of the settings on the extractor.

-
Setting the suction power
Set the suction power to the highest level.

-
Setting the hose diameter to 32

-
Switching the ON button to AUTO

-
Connecting the extractor to the pre-separator
Connect the extractor to the CT-VA and the router to the CT-VA. Connect the RG plug to the extractor and the extractor to the electrical outlet module.

-
Connecting the extractor to the router

-
Adjusting the handle
Move the handle into a position that is easy to guide.


Procedure
-
Has everything been connected?
If the equipment is ready, set the speed to 6. Switch on the RG 130, lock the switch to continuous operation as described and run at full speed. Keep both hands on the machine. Use the two handles! Carefully position the sander on the ground and guide it, making circular movements. Always move the sander from the outside to the inside of the material to be removed until it has been completely removed right up to the edge.

-
Milling close to the edge
When milling the edges, remove the guide table, fold up the brush segment at the front and then mill the edges. This means that a single machine can meet all of our needs. For your convenience, sand off the edges after sanding down the surface.

-
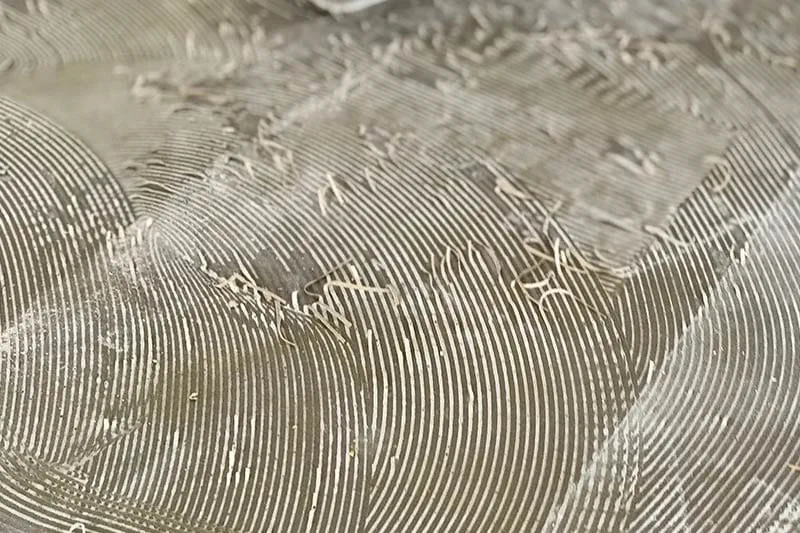
Milled surface
If the complete surface has been removed right down to the edges and down to the wood, you can use the parquet sander to carry out precision work, including on the sealant, without any difficulties.


-
Our illustrated guides and work results are documented working steps that we have performed in practice. They are individual examples and do not guarantee or promise that users will obtain the same results. The results will depend on the user's experience and skill, as well as the material being used. Illustrated guides do not replace any Festool operating manuals and/or safety instructions. Liability for ensuring that the information, instructions and applications are free from content defects and defects of title, in particular with regard to the absence of defects, correctness, freedom from third party intellectual property rights and copyrights, completeness and fitness for purpose, is excluded. Claims for damages made by the user, regardless of their legal basis, are excluded. These liability exclusions are not applicable if the damage was intentional or caused by gross negligence, or in cases of statutory liability.
We cannot accept liability for damage resulting from defects.↑
