Routing multipoint locking systems

Description
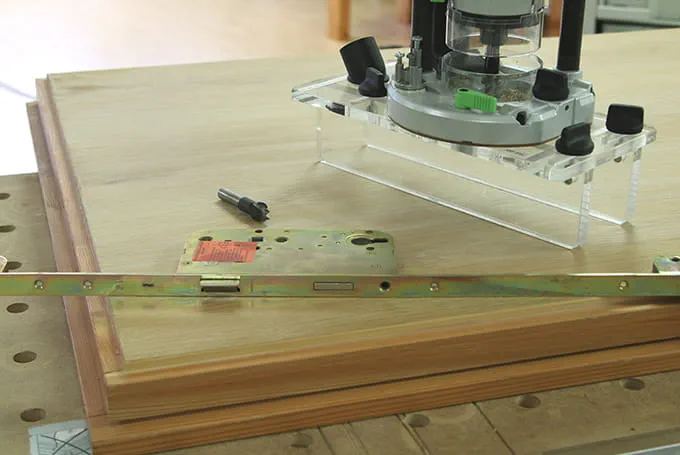
The OF-FH routing aid makes it possible to rout grooves on the rebate side of doors without requiring a stationary router. The routing aid makes edge trimming easier, particularly when routing grooves and slots for security fittings, sliding bolts, etc.
This guide demonstrates how easy it is to use this routing aid and how it can be used to carry out even difficult work in hardly any time.
Tools/accessories
Alternative tools
Preparation/set-up
-
Set up the routing aid and the selected router as follows:
First, insert the corresponding cutter (stepped cutter) into the router. The stepped cutter makes it possible to rout two groove levels at once. The upper groove is for the "cuff" and the lower groove is for the bolt (mechanics) of the lock.
-
Next, fasten the routing aid on the router. Two threaded bolts are supplied for this purpose with the recommended routers. When centring the routing aid on the router, a 30 mm copying ring must be attached (this is among the items included with the router).

-
The routing aid is adjusted in the next step.
When doing so, ensure that both parallel side fences on the routing aid correspond exactly to the thickness of the door.
If the routing aid cannot be guided on the door without play, this creates inaccuracies.
Now place the doors on the hinge rebate side so that the lock case rebate is facing upwards.
Next, use fastening clamps to clamp the door onto an MFT multifunction table.
Next, place the router and routing aid on the door rebate and set the routing aid to the required dimension (cuff thickness).
Finally, connect the suction hose with a diameter of 36 mm to the cutter.
Procedure
-
During routing, observe the following factors:
Always ensure that routing is performed in reverse direction. This means that the router infeed is always guided in the opposite direction to the cutter's direction of rotation.
The router and routing aid must be held securely and guided evenly during routing.
The multipoint locking system can then be installed in the door rebate.
-
Machining tip:
Before the "cuff" (fastening profile) is fitted using the corresponding stepped cutter, the lock case is routed using a groove cutter, if necessary.
-
Our illustrated guides and work results are documented working steps that we have performed in practice. They are individual examples and do not guarantee or promise that users will obtain the same results. The results will depend on the user's experience and skill, as well as the material being used. Illustrated guides do not replace any Festool operating manuals and/or safety instructions. Liability for ensuring that the information, instructions and applications are free from content defects and defects of title, in particular with regard to the absence of defects, correctness, freedom from third party intellectual property rights and copyrights, completeness and fitness for purpose, is excluded. Claims for damages made by the user, regardless of their legal basis, are excluded. These liability exclusions are not applicable if the damage was intentional or caused by gross negligence, or in cases of statutory liability.
We cannot accept liability for damage resulting from defects.↑


