Sandpit for children
Required materials
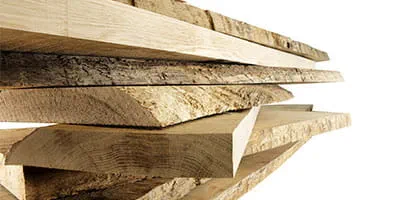
- Position 1*: 2 pieces; Deck plate, Front and rear, Length: 1180; Width: 739; Thickness: 18; BFU plywood
- Position 2: 2 pieces; Deck plate, side; 1000 x 150 x 18; BFU plywood
- Position 3: 2 pieces; Sandpit, Front and rear, 966 x 248 x 18; BFU plywood
- Position 4: 2 pieces; Sandpit, side 1050 x 248 x 18; BFU plywood
- Position 5: 2 pieces; Struts, side 300 x 230 x 18; BFU plywood
- Position 6: 2 pieces; Ground struts, side 1086 x 107 x 18; BFU plywood
- Position 7: 2 pieces; Ground panel, front and rear, 750 x 296 x 18; BFU plywood
- Position 8: 2 pieces; Front and rear reinforcement; 550 x 230 x 18; BFU plywood
- Position 9: 2 pieces; Head and tail; 230 x 100 x 18; BFU plywood
- Position 10: 4 pieces; Mounting battens for cladding; 300 x 35 x 30; Spruce, pine
- Position 11: 4 pieces; Cladding; approx. 1500 x 600 x 6; BFU plywood
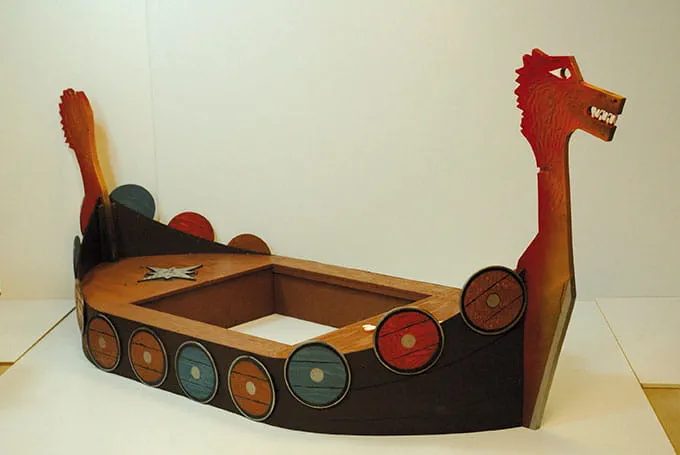
- Position 12: 20 pieces; Round shield dia. 250; Thickness: 8; BFU plywood
- Position 13: 1 piece; Dragon head; 1370 x 420 x 40; Spruce, pine
- Position 14: 1 piece; Dragon tail; 1150 x 260 x 40; Spruce, pine
- Position 15: 4 pieces; Longitudinal braces; 400 x 248 x 18; BFU plywood
* Position in drawing
Construction plan drawing
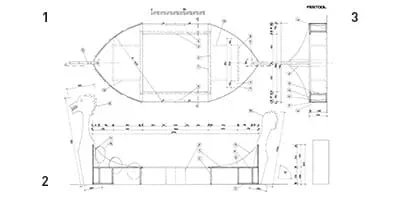
Construction drawing, scale 1:5
- View from above
- View from the side
- View from the front
Additional tool
- Mortise chisel
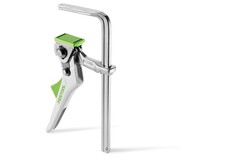
- Bracket
Procedure
-
Step 1
Use a piece of string acting as a compass the length of the radius given to help mark out both of the outer curves on the cover plate (position 1). First, mark out the width of the deck plate on the board. Then on the front side, mark the centre point and draw the outlines for the head and tail.

-
Step 2
Put a nail into the first centre point and fasten the string to it. On the other end of the string, make a loop and attach a pencil. Draw both curves onto the deck plate first, cut them out and transfer the curve to the other deck plate and the base panel (position 6).

-
Step 3
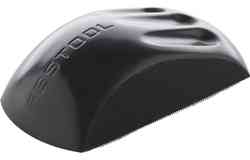
Use a jigsaw to cut out the three pieces and deburr the cut edges with a hand-sanding block. The straight boards can be cut with a portable circular saw and guide rail. Alternatively, you could ask the builders merchants to cut the individual parts for you.

-
Step 4
Drill 4.5 mm holes for the 4 x 45 mm SPAX screws in one of the two boards that are going to be connected together. In both of the position 16 pieces, drill four holes and use these as connection pieces when screwing positions 1 and 2 together.

-
Step 5
This will give you one continuous deck plate. Then screw the four sides of the sand pit to one another. Both of the side ground panels (position 6) should be screwed to the sandpit. Line up the sandpit with the underside of the deck plate and use a few lines to mark on it the exact position.

-
Step 6
Clamp both longitudinal braces (position 5) and the reinforcement to the sandpit and screw it all together.

-
Step 7
The front and rear ground panels (position 8) should be lined up parallel to the deck and screwed together. Connect the deck and base frame to one another from underneath using square strips.

-
Step 8
Cut these slats to the specified sizes from the material list. Screw them lengthwise onto the sandpit and crosswise on the front and rear reinforcement.

-
Step 9
Put both of the fastening plates for the head and tail (position 10) into position between the deck and the ground plate and screw them together tightly.

-
Step 10
Use the remainder of one of the construction planks and glue it onto the snout so that you can make the dragon's head larger. Draw the shape of the head and tail using a pencil. Use a jigsaw to cut around the curves. Use a curved saw blade and cut slowly.

-
Step 11
This will save you from needing to do lots of reworking. Round off the edges of the head and tail using a hand-sanding block or an edge router. You could insert dowels or twigs into the dragon's mouth as teeth. If you have a whittling knife, you could carve scales into the head and the tail.

-
Step 12
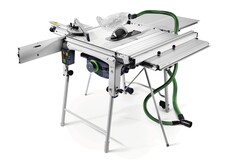
Cut the four mounting battens (position 11) on a 30 degree angle using a table saw. Cut these slats to the specified sizes.

-
Step 13
Screw the head and the tail to the hull of the ship. Mark the vertical edge where the mounting battens will be screwed on. Screw on the four battens tightly. On the side deck plate, mark the centre line where the cladding will meet. Measure from the centre line to the head and to the tail to obtain the length of the individual cladding planks.

-
Step 14
Transfer these measurements to the 6 mm plywood sheets. Add 10 mm to the length. Draw a freehand curve with a pencil. Cut out the first piece of cladding and use this as a template to mark out the other three. Deburr all of the edges using a hand-sanding block. The edges which meet at the head and tail should be cut at a 30 degree angle using a hand planer.

-
Step 15
Hold the first plywood sheet up to the boat and mark the positions of the screws. Screw down the first two boards. When you have screwed the other two boards on, you will see that there is an overlap in the centre. Mark the overlap onto the screwed-down board, then loosen it so that part of it comes away from the boat. Use a jigsaw or a hand planer to cut away this overlap.

-
Step 16
Use a jigsaw to cut out the shields. You could also use jigsaw to cut hatches into the deck and use the space underneath as a storage area.

-
Step 17
Your imagination is the only limit when it comes to the shape of the hatch covers. Any parts that will be painted should be sanded with a P180 grit sandpaper.
We recommend that you remove the four cladding boards and paint them separately.
-
Step 18
Apply the base colours to the individual parts first and then use an aerosol can and paintbrush to highlight certain areas. When everything is painted, screw the shields to the boat.


